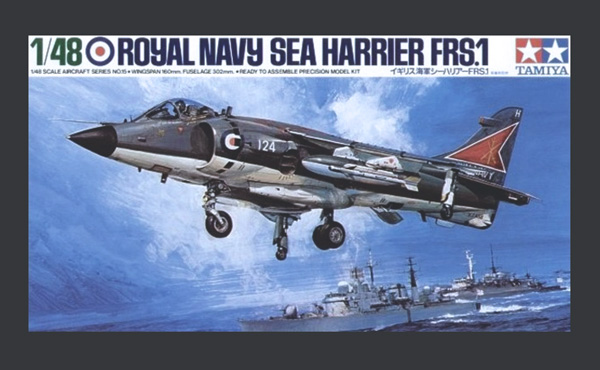
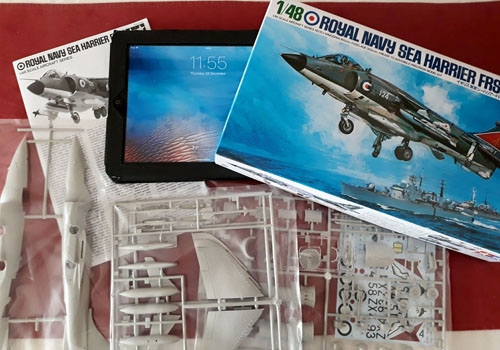
This is a photo-build of Tamiya’s Sea Harrier FRS.1, 1/48 scale model, ref 61026.
Unboxing and Kit Review
It should be noted straight away that this is an old kit, first tooled in 1971 – and it shows! This was before the Harrier had entered active service with the Royal Navy, so it’s a combination of old moulding design and techniques, merged with designing a kit based on projections as to what the final design will be. It is very lacking in detail in areas, especially the cockpit and ejector seat (which is literally just plain plastic), and no detail in the wheel wells.
If you have heard that Tamiya make great kits then this one is the exception to the rule. The problem is that it’s cheap, and people keep buying them, and if people keep buying them then there is no incentive for Tamiya to do a new tooling.
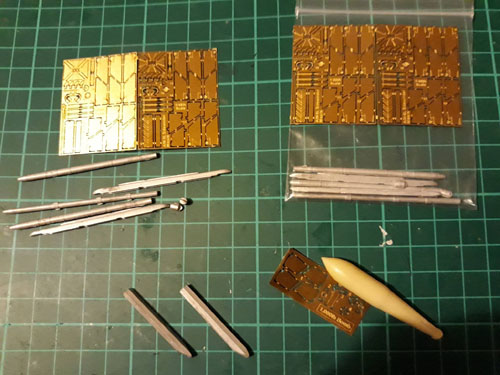
I decided to complement the build with Flightpath’s upgrade set. Though this costs more than the kit itself it represents massive value, with large frets of photo-etch. This not only includes replacement parts for the external details, but also weapons, FOD covers and ladder. The weapons include white-metal cast sidewinders and rails, and even a resin 1000lb bomb.
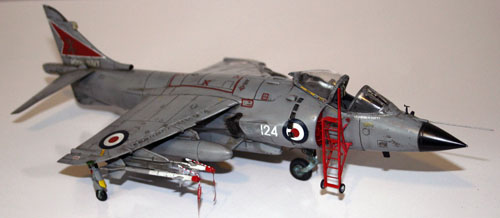
Instead of using the scheme on the box art I decided to paint mine the way they were painted for the Falklands Conflict, which also meant I could get a bit more creative with the weathering as the Harriers got very dirty during their time in the South Atlantic performing multiple sorties a day.

Correcting Kit Errors
There are some large errors in the kit, and unfortunately these come from the design and tooling process. Either the kit Tamiya’s quality control was a lot lower in the 70’s, or the kit was rushed out. I suspect a combination of both, as I simply can not except that even when this kit was first released that standards were so shoddy.
Firstly the kit has severe fit issues. Be prepared to use plenty of filler and sanding to get smooth joins between the parts. The panel on the back that allows you to see the engine doesn’t fit properly, and unless you want to spend A LOT of time scratch building detail for the engine you will want to seal this up.
The kit also had raised panel lines. I sanded then down and re-scribed the entire kit so that these details could take a wash.
Moulded details are also huge.
There are errors (no doubt taken as a short-cut) such as the joins where the tail-planes connect to the fuselage not having the upright panels, and critically the air intake doors that go around the side of the intakes are moulded shut. Well, they are actually moulded at all – it’s smooth. When the Harrier is in flight the pressure of the airflow will push these closed, but when the engine isn’t running the top ones are open due to gravity (with the side ones hanging in slightly). Some argue that they like the look of the doors closed, but in reality this isn’t prototypically and feel the addition of these doors being open adds interest to the model.
Initially I used the Flightpath upgrade set to replace the doors, but this didn’t work too well. In the and I removed the areas completely, fitted some plasticard strips and cut out the doors. This filling and sanding the results were a lot better than I hoped for and definitely worth the work involved.
Other areas that were in desperate need of attention were the exhaust nozzles. These are shockingly shoddy and I can’t believe that Tamiya thought the way these were moulded was acceptable. The Flightpath set had new vanes, but this could have easily been done using brass sheet or thin plasticard. Again, another simple upgrade.


Priming and Painting
Once the Harrier had received a primer coat the hard work started to show. I was pleased that join lines were minimal, and the additional details from the scratch-building and photo-etch upgrades were blending in nicely.
Pre-shading was applied, before the final coat. This was a dark grey by Tamiya (I can’t remember which) and was chosen by comparing paints with pictures of the real aircraft. This was a little lighter, but I knew this would be toned down and darkened in the weathering process.
Weathering was achieved with Flory Models clay based washes, mainly the Grime and Dark Dirt. These are painted on and left to dry before being wiped off with paper towel. This leaves a filter over the model and also highlights panel lines and other recessed details. The paper towel can also be dampened to remove more for a cleaner look.


Summary of the Tamiya 1/48 scale Harrier
I honestly do not feel that I can recommend the kit because it is such a poor standard compared to so many other kits out there, and the “cheap” and “old moulding” arguments really do not stand up.
Many will say that it represents a route into 1/48 scale model for those moving up from 1/72. I disagree, as for only a little more there are plenty of kits in 1/48 scale that have a lot more detail and less fit issues which would make a much nicer route into this scale. If anything this kit should be reserved for more experienced modellers who are not adverse to testing their skills.
The people who would benefit the most from this particular kit are those like myself who want to embrace the challenge of improving their modelling skills, and to do it on a cheap kit as to take the pressure of making mistakes off. Over the course of making this model (and in conjunction with the Flightpath upgrade set) I had experience in:
- Working with photo-etch
- Working with white metal
- Working with resin
- Scratch building and modification
- Re-scribing
- Detailing
- Custom paint
I can see the difference in my model skills both pre- and post-Harrier. I also have more confidence in applying these skills on other models. Since building the Harrier I had re-scribed other aircraft, and hacked away chunks of plastic to make modifications.
The result is far from perfect, and this is to be expected for my first model using so many new techniques in one go. However, it is still a vast improvement from making the kit straight from the box without using such techniques to at least modify it (even if an upgrade set is not purchased).
I would like to build another Harrier FRS.1 (or other derivative) as they are great aircraft, but next time would like to try a more modern kit and see how that balances with the fun – and frustration – of of this kit.