Complete build of Eduard’s FW190A-8/R2 1/48 scale model, ProfiPACK edition – reference 82145.
Watch the video review of this Eduard 1/48 ProfiPack FW190A/8-R2 (along with further text and photographs).
Cockpit


Main Build


Priming and Pre-Shading
Starting with priming, which was MRP Grey Primer, which went down very well, and smoothly with a little coverage of Self-Levelling Thinners. MRP Tyre Black was used for the interior of the canopy and panel-line pre-shading.
I used MRPs for the priming and pre-shading because they go on really thin and I wanted to do everything I can to preserve the very fine recessed detail on the kit.


Paint
The main scheme was using the Vallejo paint set. I allowed at least 24 hours between each colour to ensure the paint was not only dry but fully cured before masking.
Once the main camo was painted I tackled the mottling on the sides, but had issues with the airbrush and paints; which created spidering, as lots of speckles in places I didn’t want them. I had better results with a lower air pressure and using the Vallejo paints neat (so not adding any flow improver, thinner or retarder). This meant the paint was regularly drying on the needle.
When the mottling was dry – but before it cured – used a cotton bud dampened with Isopropyl Alcohol to wipe around the mottling and clean of the speckles and overspray.
I used MRP Gloss varnish to seal the paintwork.


Decals and Weathering
Having had issues with the MRP Gloss varnish and trying different techniques to correct the ‘orange peel’ finish it had, I glossed using the Pledge floor polish, which finally gave a finish that was acceptable
The decals were a little thick, but did go on well. I need to use the MicroSet and MicroSol, not necessarily to ease the decals over raised features and settle into panel lines; but to try to break down the carrier film.
After a few days of regular applications the model was given another coat of Pledge floor cleaner to seal, and eventually the decal carrier was lost – only catching the light in certain angles. I was confident that matting the tone with weathering would help this more.
Having considered weathering options I decided to use Flory Models Brown Wash. This would work well with the lower side, as well as still be visible on the darker upper surfaces. I think using black would be too stark.
It is simply a case of brushing the water based wash over the aircraft, and how long you leave it to dry, and how you remove the wash will vary the effect. I waited a short period for the wash to dry, but it was still mainly wet when I started. This meant that the majority of the wash was wiped off, but left pigment in the recessed panel lines, hatches and rivets.
I used dry kitchen towel for this as the wash was still wet, but more can be removed by dampening the towel. In fact, it can be washed off completely if desired. I used a cotton bud to get into tighter areas, and dampened this as required.
The wash muted down the gloss so not further matt coat was required, and gave a worn muddy finish to the aircraft as a whole, without making it too muddy. As explained, you can vary how you apply and remove the wash to get different results.


Detailing & Oil Paint Weathering Effects
With the main overall wash complete it is time to put on the final details, these are parts that can be quite delicate to so I waited until the main weathering process was complete. This started with the landing gear, then there were items like the canons and pitot tube.
Some of the finer details could either be styrene, or using the photoetch parts for more finer detail. I went with the photoetch where I had the option, and this was good for little ariels and direction finder ring. Once in place these could be delicately brush painted.
The landing gear (as well as the newly added detailing parts) were given a coat of Tamiya Panel Line Wash (Brown), with the excess removed. This not only knocked back the freshness, but the wash also helps highlight the moulded details.


Using oil paints I dabbed small spots on oil in places (such as the cartridge shoots) and using a brush blended the oil paint in the direction of airflow. This could be ‘knocked back’ using a clean brush slightly dampened with white-spirit, and cotton buds to shape where necessary. Slowly depth is built up with layers, and different colours blended.
I used some elastic thread using for model shipping rigging for the ariel cable.
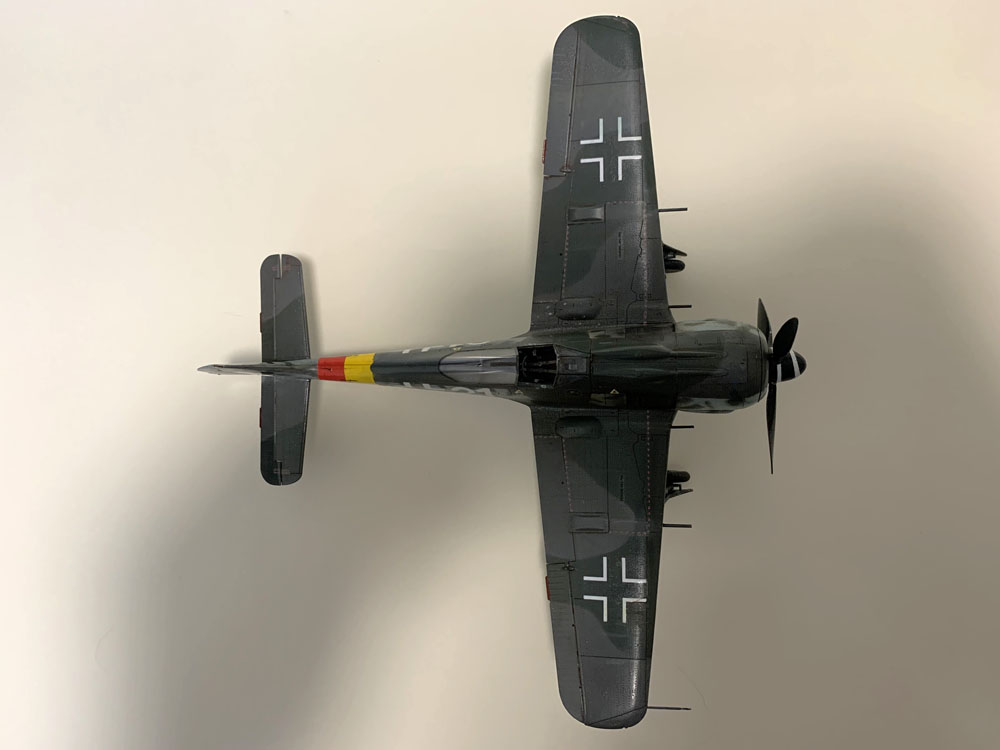
Final Reveal Pictures
I enjoyed this kit, for me it ticks the following boxes:
- Fine recessed detail that takes a wash well
- Good detail on all visible parts (such as cockpit and engine)
- No internal/non-visible parts which speeds up the build process
- A good variety of schemes and options to choose from
- Clear instructions
- Photoetch fret included (no need to purchase separately, or rely on styrene parts
- Masking set included (not essential, but saves purchases separately or saves time masking with tape)
- Plenty of parts and decals left for the spares box
- Affordable price for all that’s included
I’m pleased with the final result, and it looks good on the shelf. Although I wanted to do this kit quickly to get my mojo back, it took longer than planned – but that was mainly down to me not putting in the time. Still, I built it quicker than something like a Tamiya kit which has more parts (some not even visible), but I think the finished model is comparable. The number of options and extras does make the Eduard ProPACK editions great value for money and definitely worth considering when selecting future builds.