
My unboxing and kit review of Tamiya’s Lockheed Martin F-16CJ Block 50 Fighting Falcon 1/72 scale model – ref 60786.
Un-Boxing and Kit Review
This is a plastic kit spread of five main sprues (two are duplicates) with clear sprue for the canopy and lights.
One of the first things to stand out is the box art – or lack of it. Instead of an artist’s impression of the aircraft in flight, Tamiya have instead optioned to have a photograph of the completed model itself. This has been built to a very high spec, but shows what a pro modeller could hope to achieve.
There are three decal options in the kit, though the main external paintwork (three shades of grey) is broadly the same for each, with only minor differences. The differentiation comes from the decals.
It is a modern kit (released in 2014), and the quality of Tamiya’s kits in recent years has been really high. This kit is not an exception, and the level of detail is immediately obvious.
In fact, the more you look at the plastic parts more and more detail seems to come out. This detail is very fine, and care will need to be taken to ensure that this detail isn’t lost with too thick an application of primer and paint. The recessed details are shiny, looking like they’ll need a wash to really bring the detail out.
The clear parts themselves are really clear. Really, really clear! Hardy any distortion despite the bubble curve, though not as thin as, for example, the canopy in the 1/72 scale Revell Tornado GR.1 which I built last year. There is a hint of a seem line in the canopy, but apart from that no polishing would be required. The canopy is also protected in the sprue “cage” to prevent damage in transit.
The decals are really nicely printed. There isn’t too much colour to them, but where there is it is vibrant. The decals do feel quite thick, but often with Tamiya decals they will confirm following a few application of decal setting solution.
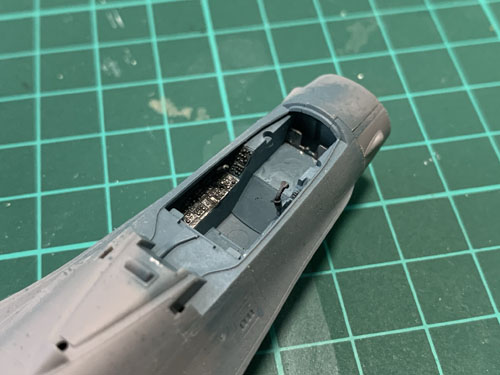
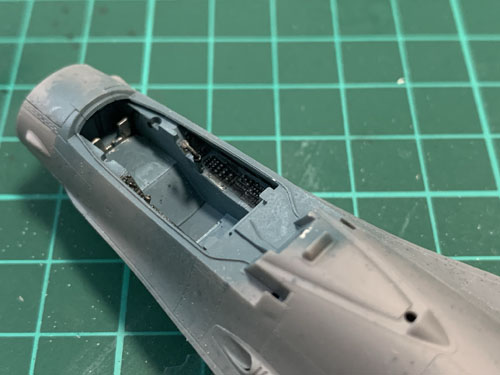
The instructions are clear, and the build should be relatively simple. One area to watch out for is is the instructions call for the landing gear to be installed, then a piece of bodywork helps lock them in. Though this is logical to build the plane, it doesn’t take into account the painting, where the modeller will want to build the body, fill panels, prime and paint, then adding the landing gear towards the final stages. The instructions do not give an options for in an inflight model, though this shouldn’t cause any issues for the builder. However, the pilot supplied is clearly “inflight”. If the modeller wishes to display with the cockpit open and no pilot (the most likely combination) straps and harnesses will need to be either be decals or scratch built. This seems to be common for Tamiya, and though decals should be fine for 72nd scale – I don’t this it’s acceptable for their 48th kits!
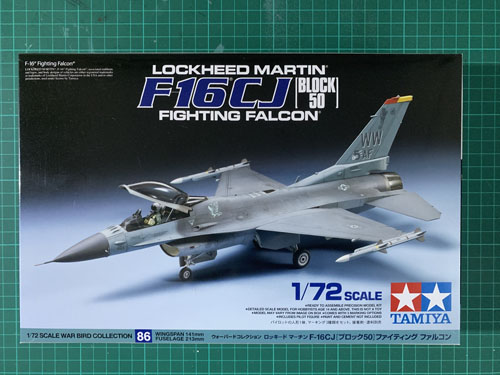
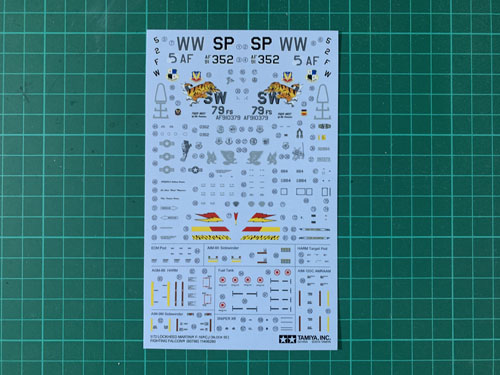

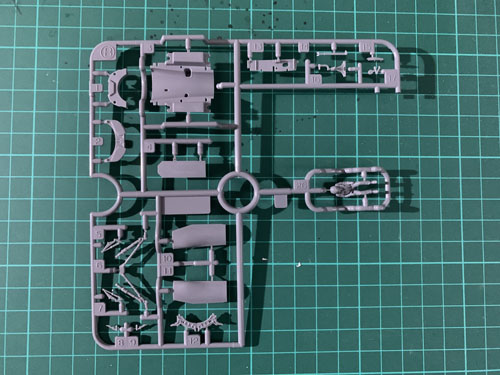
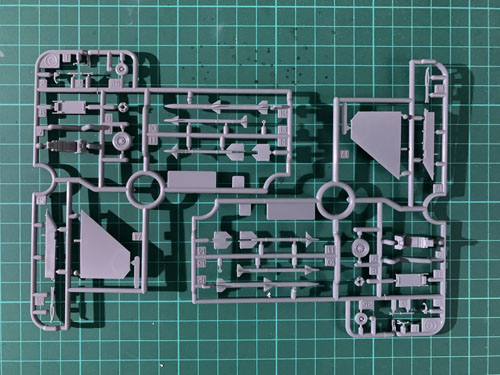


The final model aircraft will be small, and the cost is quite high for the amount of plastic – especially when you consider that Tamiya’s 1/48 scale F-16 is not that much more. However, the kit does make up for that in detail in the model.
Build Process
The bulk of the build was relatively quickly and was achieved in a single Twitch Live Stream. You can watch my live streams at www.twitch.tv/robsmodels.
There really wasn’t any problems encountered with the main build, and as long as sprue gates are sanded down then test fitting wasn’t even needed. By the end I was going straight in with the glue!
I decided that I would use a little filler filler on some of the larger join lines where the wings attach. If this was a 1/48 scale F-16 I don’t think it would have been necessary, but with the moulded panel lines being so fine these would have stood out in comparison. I used a little DeLuxe Materials Perfect Plastic Putty which I watered down slightly into a paste before applying, and once dry was removed with a damp paper towel leaving the filler in the gaps.
Although not called for in the instructions I weighted the nose cone with Liquid Steel, which is actually small lead discs. This was held in place with PVA and left to full dry before attaching to the model.



Pre-shading & Painting
Primed with AK Interactive White Micro-Filler and Primer, pre-shading with AK Interactive Black Micro-Filler and Primer. Once cured this was gently smoothed using a Flory Models Polishing Stick.
The external paint scheme was given in Tamiya codes (AS for their Acrylic Spray range). To ensure accuracy I checked Federal Standard (FS) paint codes, and then got the Vallejo Model Air and MRP Paint codes to ensure accuracy. I used the Vallejo Model Air range on my build.
| Tamiya Code | Part | Name | FS Code | Vallejo (used) | MRP (not used) |
|---|---|---|---|---|---|
| AS-26 | Underside | Light Ghost Gray | FS36375 | AV70.615 or AV71.312 | MRP-038 |
| AS-27 | Upper | Dark Grey / Gun Ship Gray 2 | FS36118 | AV71.097 | MRP-040 |
| AS-28 (XF-10) | Upper | Medium Gray / USAF Medium Gray | FS35237 / FS36270 | AV71.114 / AV71.275 | MRP-039 |
| AS-10 (XF-20) | Nose Cone (Tigermeet variant) | (RAF) Ocean Gray | FS36270 | AV71.273 | MRP-115 |
| XF-1 | Flat Black | Detail parts | |||
| XF-2 | Flat White | Wheel bays, landing gear, etc | |||
| XF-85 | Tyres | Rubber | MRP-173 | ||
| X-32 | Jet Nozzle | Titanium Silver |

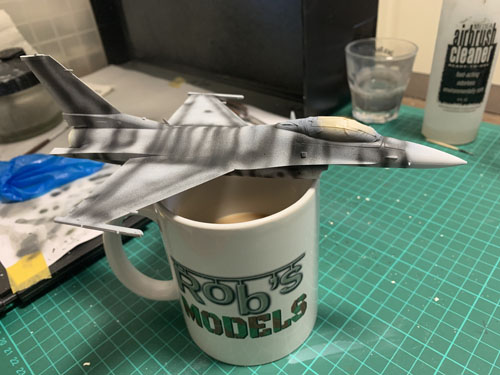
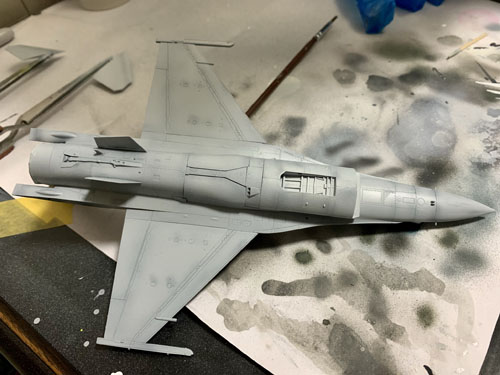
I realised when I was about to paint my Tamiya 1/72 scale F-16CJ Block 50 model that the paint I was about to spray I had already used.
It took me a moment, but it dawned on me I had got my paints muddled – and needed to strip the paint off to reveal the primer and pre-shading instead of merely spraying the correct paint over. Not only that, because of the exceptional fine details in the kit I wanted to preserve it as much as possible for the panel-lining and detailing.
The paint used was Vallejo Model Air, which is acrylic based. The primer (and pre-shading) was AK Interactive Primer and Microfiller. (White for the main priming, and black for the pre-shading).
Firstly I masked the paintwork that I wanted to keep. I then applied 99.9% Isopropyl Alcohol (IPA) from a small dropper bottle to small areas at a time.
I worked this in using a tooth brush. This soon started breaking down the Vallejo acrylic paint, and was wiped away with a piece of paper towel. After a few applications the paint was easily removed and the primer (and pre-shading) was visible. Care needs to be taken to not go too far and remove the primer coat, which will get dissolved by the IPA.
The paint wasn’t removed fully, and this left a bluey-grey filter over the primer. I briefly considered applying some more pre-shading but decided against this. The IPA dries very quickly, so once I had removed the layer of paint it was immediately ready to paint with the correct paint!
Decals, Weathering and Detailing
Once the paint had been corrected and left to cure I then gave a couple of coats of Humbrol Clear Cote, mixed 50/50 with Humbrol enamel thinners. Between coats this was sanded down with high grade sanding and polishing sticks to create a semi/gloss surface for the decals to go down on.
The Tamiya decals are quite thick and there are lots of small ones. It was done in a single session – but it was a real mojo killer. I often find Tamiya decals are quite thick by with some applications of MicroSol they do thin and bed down, but these ones still had a ridge, especially on the smaller ones. In fact they were so thick that even with plenty of MicroSet I couldn’t get them to conform around the Sidewinder missiles and had to paint the stripes on.
The plan was to present the F-16 in a clean and pristine condition. However, following the error and correction of the paint I felt that the final job just wasn’t up to the necessary standard to present it as a ‘show bird’, and more work would be needed to highlight the moulded detail on the upper surfaces. However, the underside was not affected and the moulded detail (of which there is more because of the surface hatches, etc) looked good and the pre-shading was showing through nicely, without being too obvious.
I therefore decided that it would be presented in-flight. This way I could put it on a stand with the aircraft positioned to make the underside the focal point to the viewer. I closed up the land-gear doors, and there were some fit issues which would have been a lot easier to sort with filler, sanding and re-scribing which proved impossible because the model had been painted and weathering process had started.
Being in flight meant I also had to paint the pilot, and present with the canopy closed, not open to show the cockpit detail. Being a large and clear canopy means that detail is still visible – and research shows this particular F-16CJ had a clear canopy, not smoked.
The bulk of the detailing and weathering was done using oils. Washes were made by mixing a small amount of oil paint with white spirit, and specific areas had small amounts of oil paint applied directly to them. This was then blended in with a brush and a very small amount of white spirit. After leaving 24 hours for the oils to dry I felt that I had gone too far with the weathering and it was too dirty. Using paper towel that had been very slightly dampened with white spirit I gently wiped the surface of the F-16, ensuring my strokes were in the direction of airflow. This helped to clean the aircraft, but still left wash deposited in recesses and hard to reach areas.
Though not perfect I had to accept this as a compromise.
Making the Presentation Stand
To show inflight I purchased some clear acrylic tube. It was about 150mm (5 inches) long and 12mm in diameter. Being tube – not rod – it was of course hollow. This fitted in the jet exhaust, but to aid the fit I filed one of the ends to make it bevelled.
Looking at pictures of F-16 with afterburner alight (as it would be in a climb as mine will be displayed) there appears to be a ring of orange flame only protruding a little of the jet exhaust, with the flame itself having a more silvery blue colour – but not solid. In some pictures there are bluey rings.
To keep the translucent effect I sprayed inside the tube, first around the top part creating the orange ring of flame, then polished aluminium down the tube. This went about 50% of the way down, but tried to blend so it was thicker towards the top. I experimented with spraying blue rings on the outside but didn’t feel happy with the effect so removed it. I later sprayed some white in the tube to give the aluminium a more solid effect, especially towards the upper part. The lower half of the tube remained clear.
The tube was then mounted in a piece of wood. This was an off-cut and can easily be swapped for another base of better quality. I did give it a wipe with olive oil to bring out the grain. Initially the tube was inserted to that the F-16 was over the base, but found doing it the other way so it was flying away made it a lot more dynamic.
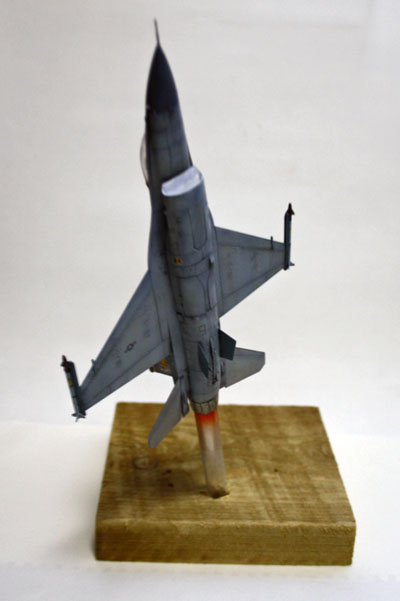
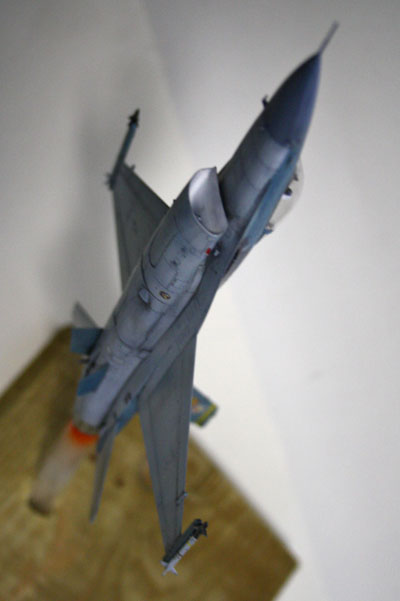
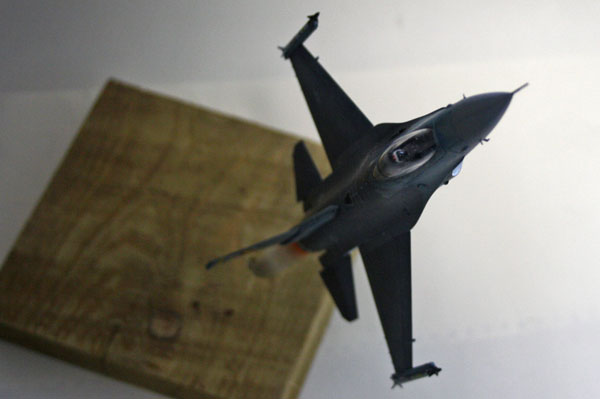
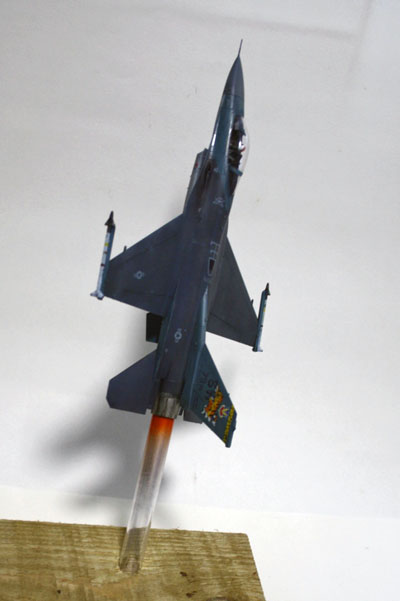
In summary I would say the kit was very nice with some very fine recessed detail, and some of this was lost due to my errors and subsequent attempt to fix and re-paint.
On refection though, this was not cheap for a F-16 in 1/72 scale, and the same version in 1/48 by Tamiya is only a few pound more. I would have to say that unless there is a reason for building in 1/72 in particular then spend just a little more and go for the larger scale, that way you have a lot better chance of appreciating the finely moulded details.
In fact, I am seriously considering doing exactly that and comparing the difference between the two mouldings in different scales – though I will have to seriously think about what paint I will use.