
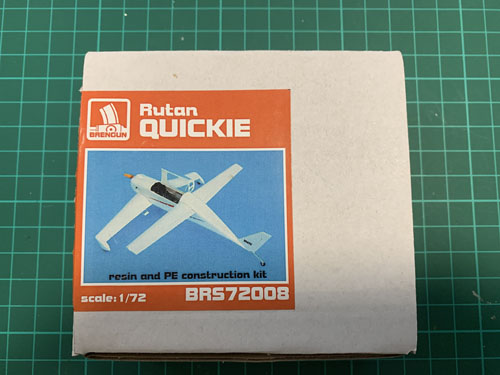
My unboxing and review of Brengun’s Rutan Quickie, a 1/72 scale model kit. Reference BRS72008.
Un-Boxing and Kit Review
The kit is comprised of 5 resin blocks, 1 vac-formed canopy, photo-etch details, clear acetate sheet, decals and instruction sheet.
First thing to note is this kit is SMALL, yes, really small. The actual prototype was only a little more than 5 metres length, and about the same wingspan. Scaling down 72 times brings us to a model length of about 7cm.
The Rutan Quickie is an interesting design, and was developed by Burt Rutan of Scaled Composites to be a small single seater plane that was purchased in kit form and assembled by the owner.
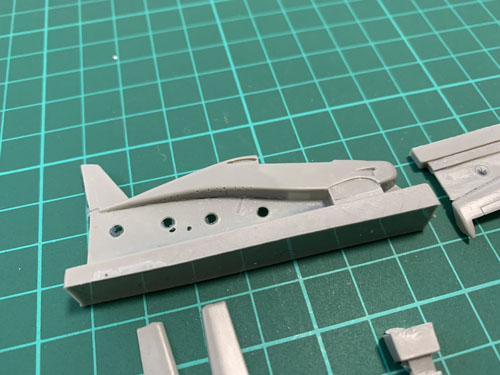
The fuselage is a single casting, and the resin is smooth, captures the detail and is very thin where necessary. Unfortunately it suffers from bubbles on the bottom on the fuselage, though this can easily be filled and sanded once removed from the resin sprue.
The wings and other components are well cast, details are recessed (though maybe a little too fine for a kit, though no doubt prototypical). No further bubbling or defects are apparent.
The canopy is vac-formed and looks thin and clear. A further polish may be necessary, but care will be needed as only one canopy is in the kit.


The photo-etch sheet is small, and it quite thick. (A lot thicker than the brass sheet used by Eduard, for example). The level of detail is high. Again, the decal sheet is small but looks likes it will work well with fine printing.
Overall it should be a fun – though small – build that will a good introduction into building a resin kit, and make a model of interest that others won’t have and no doubt prompt questions.
Build Process
The model build will be live streamed at https://twitch.tv/robsmodels, and post build review and summary will be posted once completed.
The resin parts were carefully removed from the sprues. Fortunately this will easy and as the resin gates were thin and well thought out now sawing was needed, just a sharp scalpel blade. This also meant only a little clean-up was needed with a file. Warning: Resin dust is not very nice stuff, so really do avoid creating resin dust, wear a mask and clean down straight away with a damp cloth!
The main parts were fitted together using standard CA superglue. The fit was very nice, and only a little filling was required. Whilst there I used DeLuxe Materials Perfect Plastic Putty to fill in the small bubbles from the casting process. Only a few applications were needed to remove the join lines.
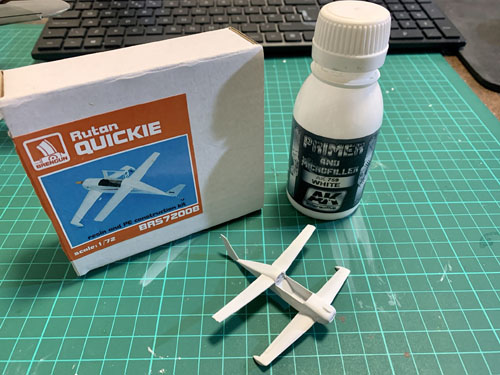
There is not much panel line detail, and what there is on the Quickie model is feint. I therefore carefully rescribed these a little deeper, cleaner and crisper. I then primed with two coats of AK White Interactive Surface Primer Mircro-filler. I also sprayed the photo-etch fret with the primer whilst at it.
The body was given a couple of thin coats of MRP-003 White Paint. Then given a couple of coats of Humbrol Gloss Cote. Note, between each application of primer, paint and gloss coat the model was gently rubbed down to give a smooth finish, allowing coats to be built up in thin and smooth layers.


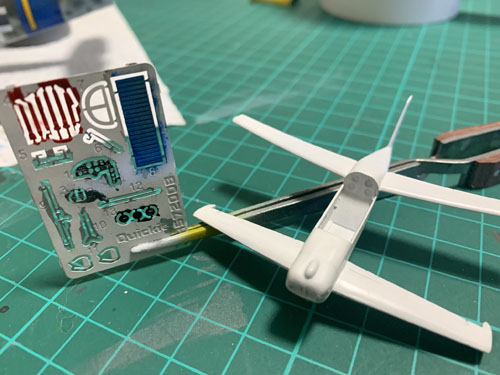

Due to the small size of the photoetch parts the individual colours were painted whilst still on the fret. Naturally this would crack flake when being built, but this could easily be touched up in situ. Fitting the instrument panel was tricky, but but was due to the clear part not be trimmed down sufficiently and not waiting for the glue to dry fully before the first attempt at installing it once it was build up (resin, clear and photoetch needs to be built up before it is installed in the cockpit.
Scratching the paint from the harness to reveal the metal underneath worked very well for the harnesses (made from six individual photo-etch parts). I’m glad I chose to paint the harness red in contrast to the blue seat cushion as I feel this stands out well, and as the prototypes were self-built planes owners would personalise their Quickie with different harnesses and fabric from the seat.